
A plumbing bid has three parts that are easy to separate and easy to miss: fixtures, piping and equipment. Fixtures are counted, piping is measured by system and size, and equipment is priced from quotes. This guide follows that order and shows where plumbing estimates usually go wrong.
Step 1: Read the Plumbing Set
Start with the fixture schedule, the plumbing legend and the general notes. Then review the floor plans, the riser diagrams and the isometric drawings. Risers and isometrics show the vertical piping and the pipe sizes that plan views often leave out.
Step 2: Count Fixtures and Equipment
Count every fixture by schedule type, because each has its own rough in, trim and labor. Include the carriers, supports and trim kits the schedule calls for.
- Water closets, urinals, lavatories and sinks by type
- Showers, tubs, mop sinks and drinking fountains
- Floor drains, cleanouts and hose bibbs
- Water heaters, pumps, backflow preventers and expansion tanks
- Grease or oil interceptors when shown on the plans
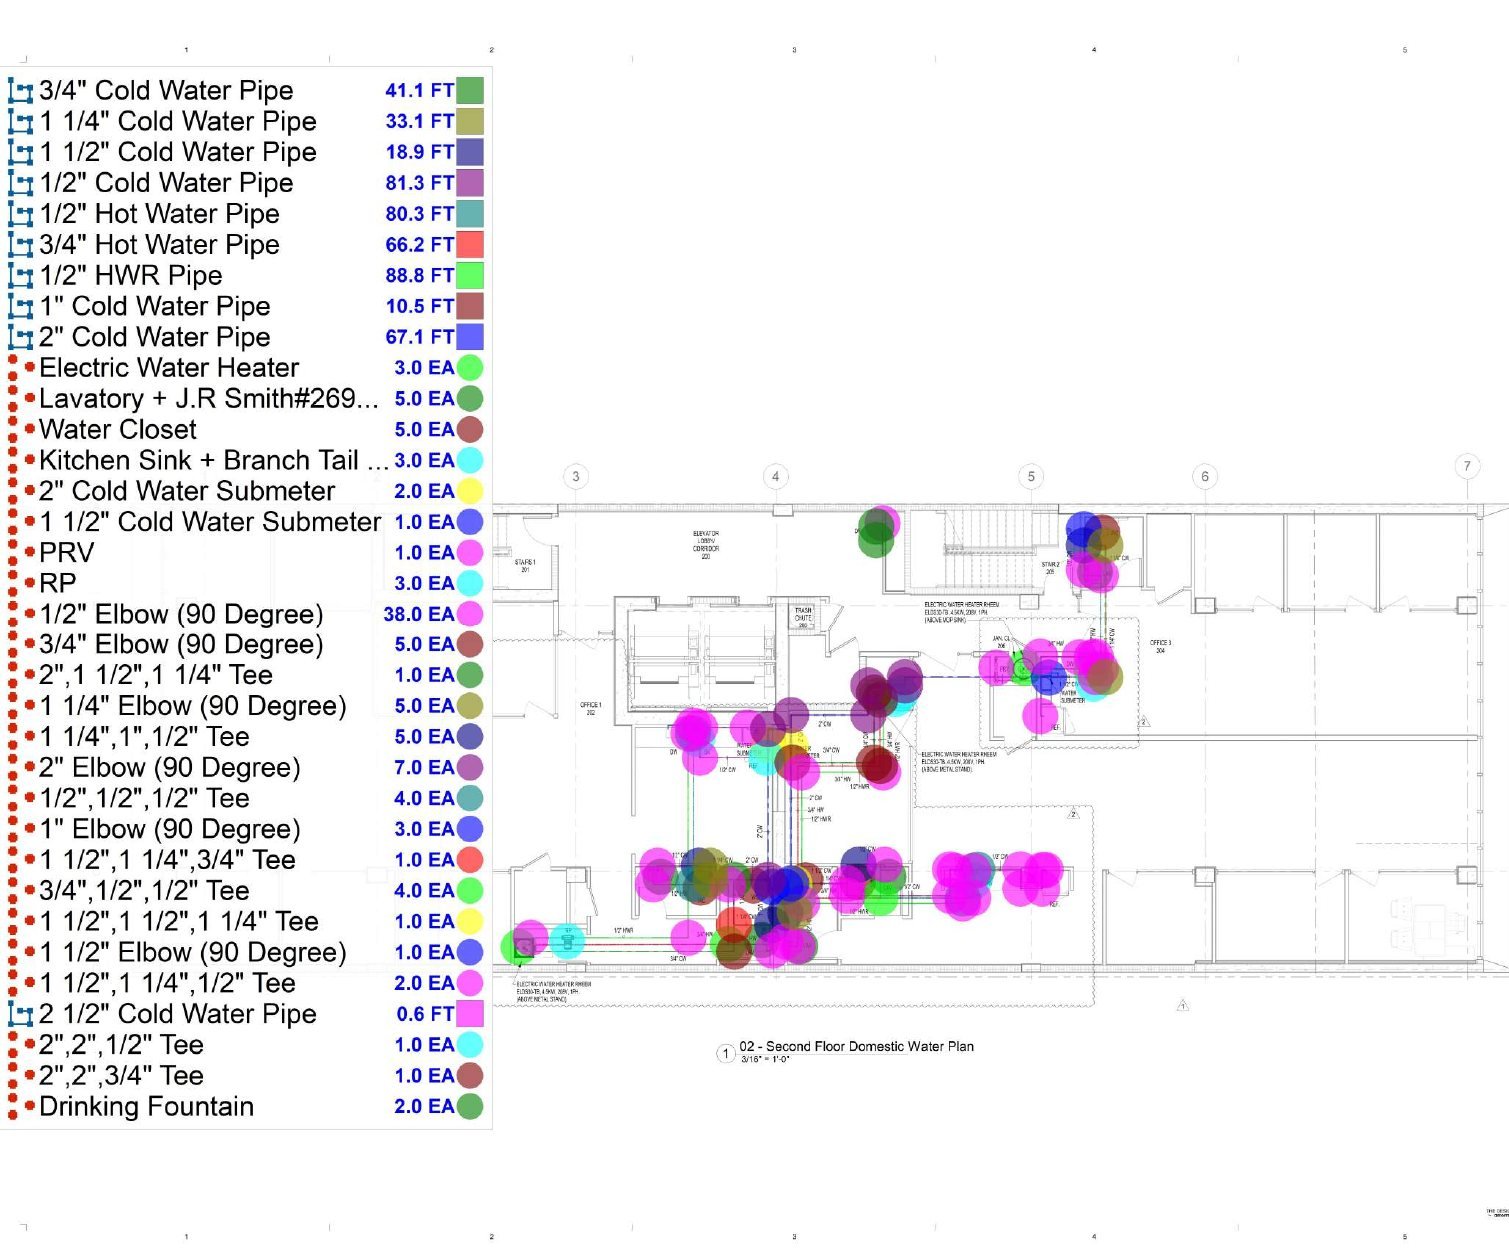
Step 3: Measure Piping by System and Size
Measure each system separately: domestic cold water, hot water, hot water return, sanitary waste, vent, storm and gas when included. Keep every pipe size and material on its own line, since a 4 inch cast iron waste line and a 3/4 inch copper water line have very different costs and labor.
| System | Measured from | Typical breakdown |
|---|---|---|
| Domestic water | Plans and isometrics | Material and size, with insulation |
| Sanitary waste and vent | Plans and riser diagrams | Material and size, above and below grade |
| Storm drainage | Roof drains and riser | Size, with roof and overflow drains |
| Gas | Gas plan and equipment list | Size, with valves and regulators |
Step 4: Add Fittings, Supports and Labor
Fittings, hangers, sleeves and fire stopping add up quickly. Some estimators count fittings from the drawings and others apply an allowance based on the piping. Either way, show them as their own lines. Labor is priced per fixture for rough in and trim, and per foot for piping by size, then adjusted for height, below grade work and occupied buildings.
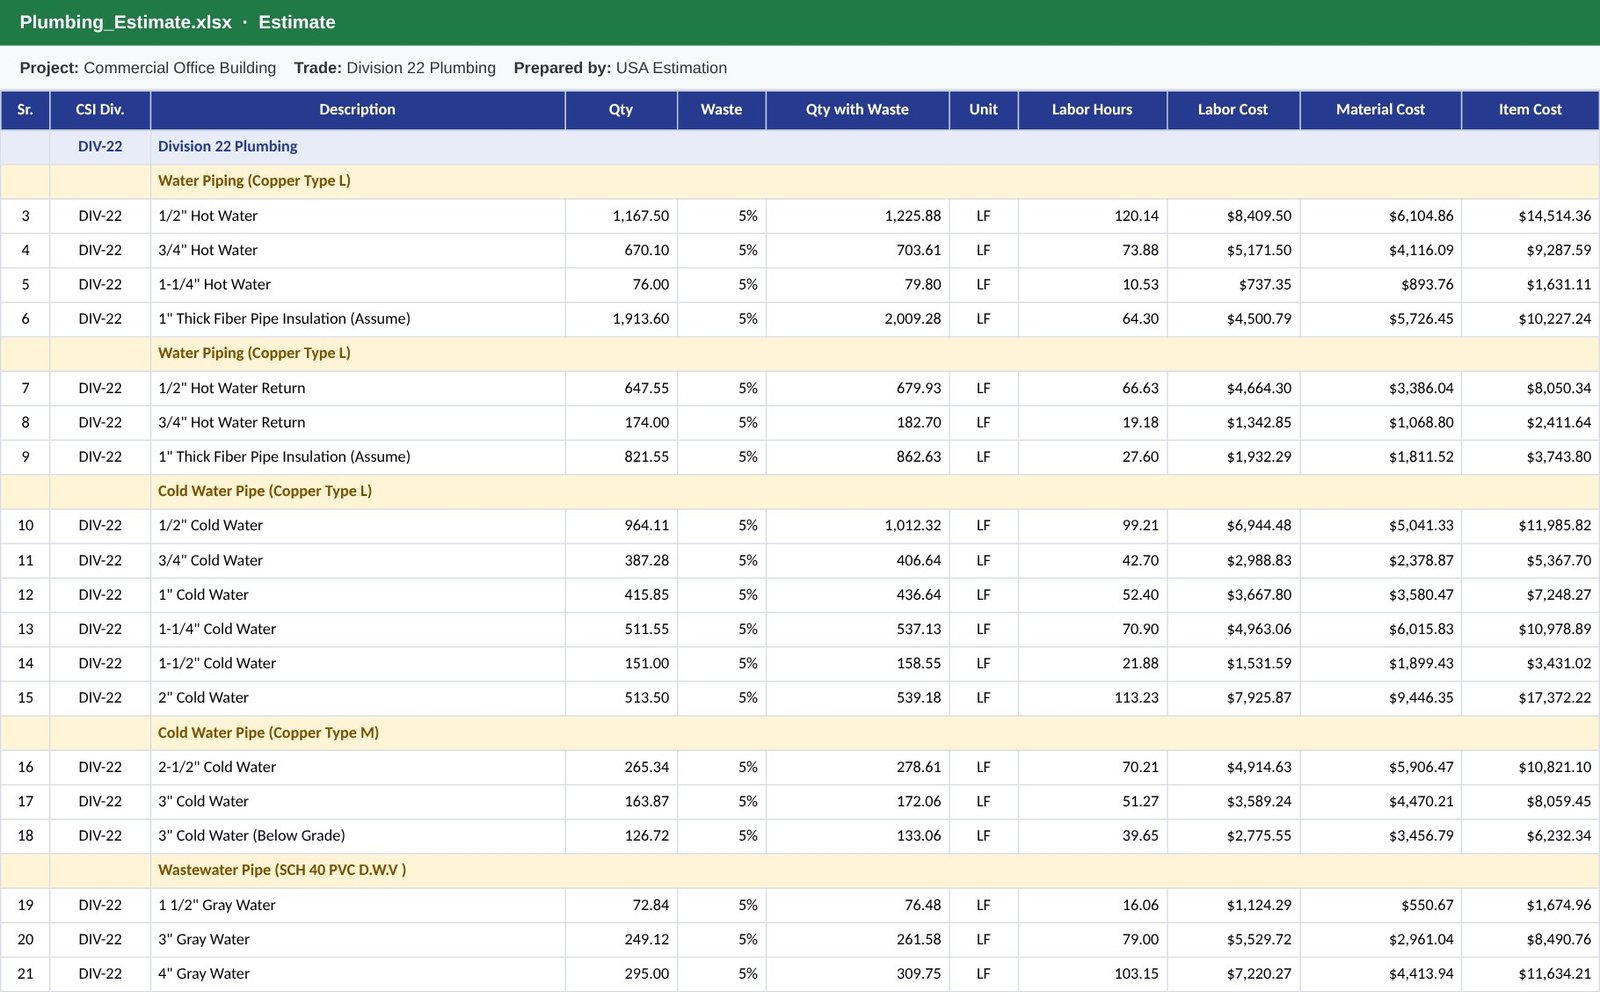
Step 5: Price the Bid
Get supplier quotes for fixtures and equipment, then add excavation and backfill for underground piping if it is in your scope, permits, testing and disinfection. Add overhead and profit, and list the exclusions clearly, such as site utilities beyond five feet of the building, fixtures furnished by the owner or work by other trades.
Common Mistakes to Avoid
- Measuring piping from plan views only and missing risers
- Pricing all fixtures alike instead of by schedule type
- Forgetting carriers, supports and trim kits
- Leaving out insulation, testing and fire stopping
- Missing equipment connections shown on mechanical sheets
If you would rather send the plans than do the takeoff yourself, see our Plumbing Estimating Services.
Frequently Asked Questions
How do plumbers estimate a commercial job?
Count fixtures by type, measure piping by system and size from plans and risers, add fittings and equipment, then price labor per fixture and per foot of pipe.
What drawings are needed to bid plumbing?
Plumbing floor plans, riser diagrams, isometrics, the fixture schedule, details and the specifications. Civil plans help for site utilities.
Should fittings be counted or added as a percentage?
Both methods are used. Counting is more accurate on complex jobs, while a percentage based on the piping can work for simple, repeat work.
Need a plumbing takeoff for your next bid?
We count every fixture and measure piping by system and size from your plans, delivered in editable Excel, usually within 24 to 48 hours.
Get a Quote